How to
Construct a Cipher Disk
Recently
I scoured the Web for a generic, clean template for creating a
26-letter cipher disk. Alas, all the templates I found had
the
standard alphabet already written in, were of poor quality, or were too
small. To solve this, I wrote a PGF/TikZ script to draw N-section disks of any size.
To help people
in a similar predicament, I've uploaded
a PDF document with three different-sized cipher disks with no letters filled in around the periphery.
Just print it out and cut out as many disk as you need.
For general cipher disk needs I created three PDFs containing templates for 26-letter cipher disks:
Following
are pictures I took of two complete cipher disks I built: a standard cipher disk
with two concentric disks, and John
Savard's rotor-like cipher disk (see the description halfway
down the page).
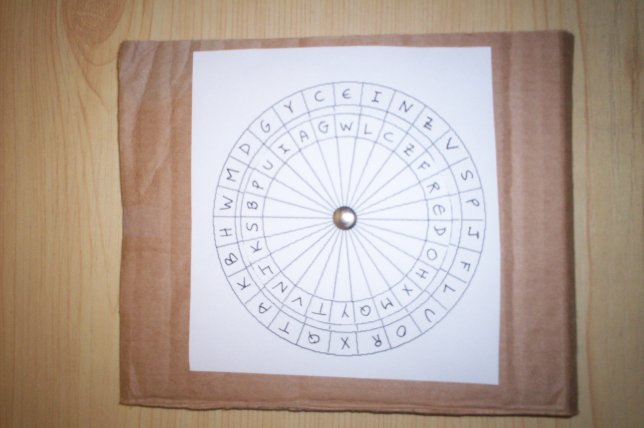
Constructing a Standard
Two-Disk Cipher Disk
1. Print out the unfilled cipher disk template.
2.
Using scissors, cut out the two largest disks.
3.
Write one alphabet component on each of the disks. The
components can be standard (i.e., A-to-Z), mixed, identical, reversed,
or any other desired order.
4. Insert a pin or thumb tack through the
centers of the disks, pinning them to a piece of cardboard , cork,
wood, etc.
Here's what mine looks like:
Constructing
John Savard's Rotor-Like Cipher Disk
1. Be sure to read
John's description
on his Web site!
2. Print out the cipher disk template twice. This is because you'll need two disks of the intermediate size.
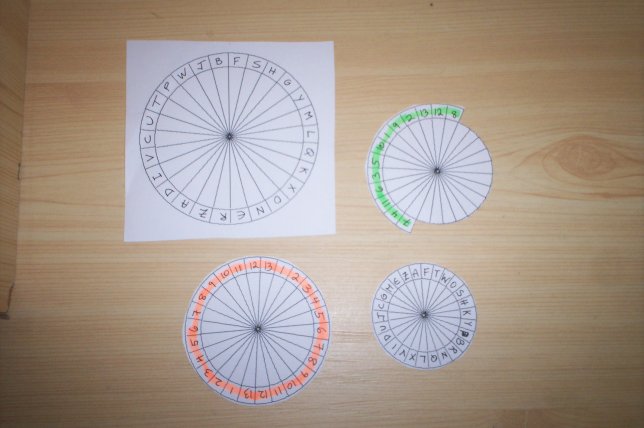
3. Cut out one (1) large disk, two (2) intermediate disks, and one (1) small disk.
4.
On one of the intermediate disks, cut off half of the outer disk.
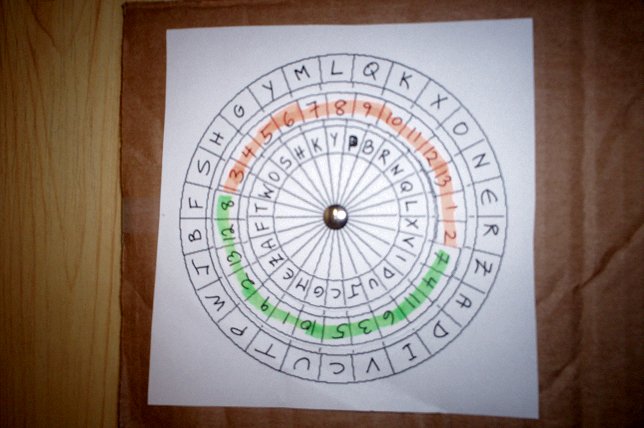
You should now have four disks that look like this (I snapped the
photo only after filling in the alphabetic and numeric components
<g>):
5.
Fill in the alphabetic and numeric components similar to the preceding
picture (I used the precise components shown on John's Web page).
I highlighted the tow intermediate disks with green and orange
highlighters as per John's diagram. It simplifies telling the two
disks apart during encryption/decryption.
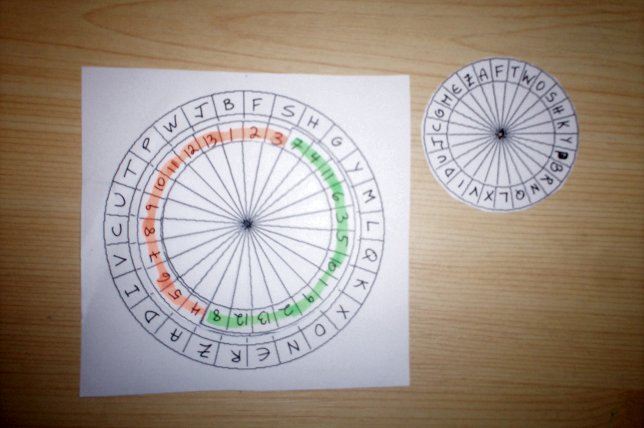
6. The orange intermediate disk will reside on top of the large disk:
7. The green intermediate disk will be mounted on the orange one:
8. Mount the smallest disk on top:
Quoting John's description for one way of using the disk:
One
way to make use of this construction would be to have layers of
cardboard between the disks, so that each rim is individually exposed
for a short distance. The 26 possible key letters would be allocated so
that seven of them are used to indicate that the lowest disk is to turn
counterclockwise from 1 to 7 spaces, another 7 turn the smallest disk
clockwise 1 to 7 spaces, and 6 indicate the disk shown with a purple
rim is to turn counterclockwise from 1 to 6 spaces, and 6 indicate the
disk with half its periphery cut away is to turn clockwise from 1 to 6
spaces.
[Ed. I hope to expand this page and show step-by-step enciphering and deciphering sessions.]
Copyright (c) 2009-2026 Moshe Rubin
Created:
3 April 2009
Updated: 12 November 2018