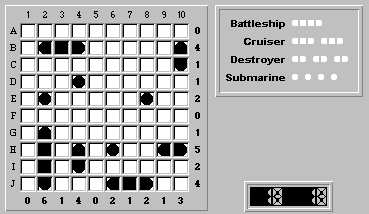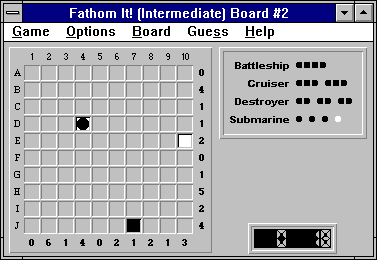
Here is the initial board:

The
middle segment at (J,7) must be flanked by two other ship segments. Since it is positioned at the edge of the board, the flanking segments must be (J,6) and (J,8). Finalizing both of these squares as wildcard segments ![]() , we get the following:
, we get the following:
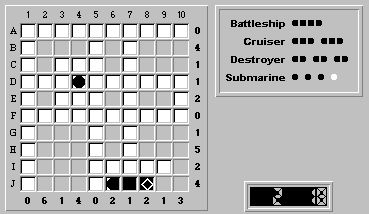
A good technique is to try to place the largest unplaced piece, in this case the battleship. There are only two possible positions to place the battleship:
We can easily show that (J,6)-(J,9) cannot hold the battleship. If the battleship were positioned there, the board would look as follows (with obvious water squares):
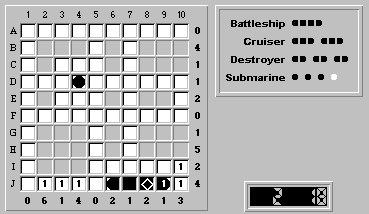
Because column 2 has a tally of six, and there are exactly six unknown squares remaining, all the remaining squares are ship segments:

However, column 3 is now completely filled with water. This is wrong, because it has a tally of one (meaning that there is exactly one ship segment in column 3). We've reached an obvious contradiction.
Our original assumption that the battleship is positioned at (J,6)-(J,9) is incorrect. Therefore, the battleship must be at (G,2)-(J,2). Finalizing the battleship there, we get:
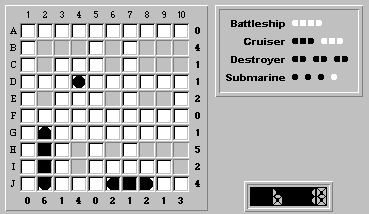
Column
3 has one unknown square and a tally of one. Therefore, (B,3) is a ship segment. Finalizing it as a wildcard ![]() , we get:
, we get:
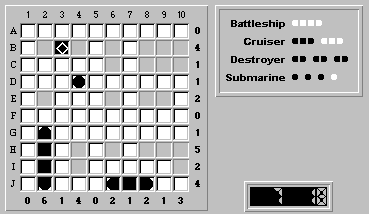
When we finalized (B,3), Fathom It! automatically filled (C,2) with water. This allows us to fill the remaining squares in column 2 with ship segments:

Column 4 falls to us because the remaining squares are all ship segments:

The same goes for column 10 -- all remaining squares are ship segments:
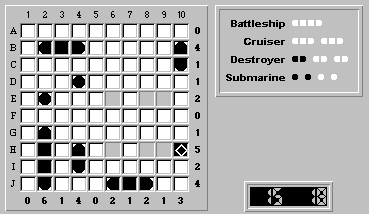
Hmm, no more "obvious" rows or columns to fill with ship segments. So we'll return to the rule of trying to place the largest unplaced ship, in this case our last destroyer.
A glance shows us that the only position to place the destroyer is (H,9) to (H,10). Convince yourself this is true.
Finalizing (H,9) as a left ship segment gives us:

Column 8 has one remaining ship segment at (E,8). Finalizing this as a submarine gives us the following board:

Finalizing the last remaining square (H,6) as a submarine gives us the solution:
